One of the most important elements in photography is lighting. It was also one of the hardest concepts for me to grasp when I began. So, today I wanted to share some lighting tips & tricks with you to help light work for you and not against you.
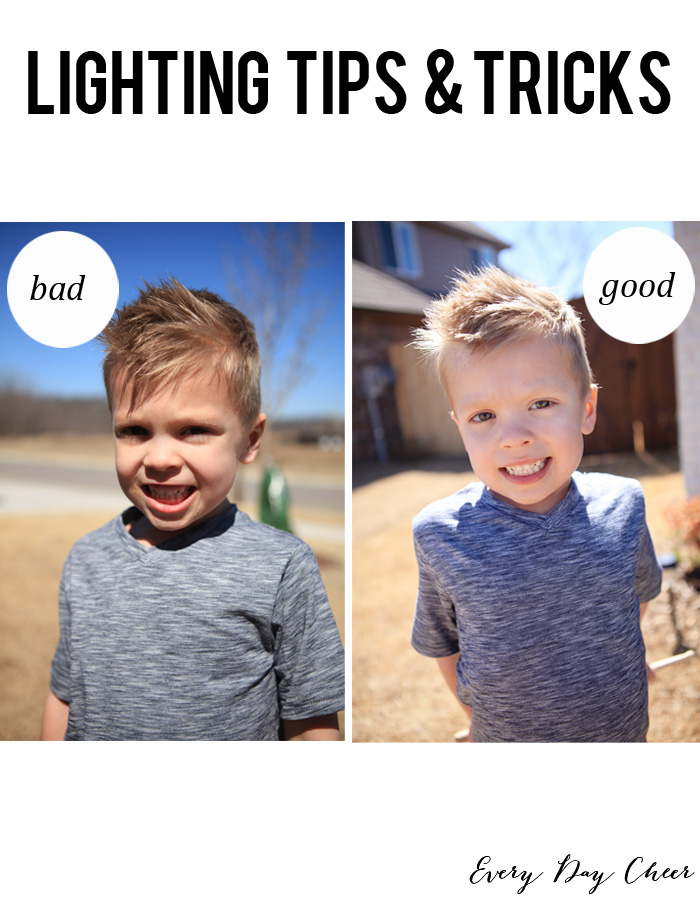
01. Avoid harsh shadows on the face - as you can see in the above sample images I was outside trying to take a picture of my son. The sun in the “bad” example was behind me, therefore, creating shadows on his face. It was around the noon hour and the sun was too high in the sky for a front lit shot. By simply turning him around (and backlighting the image) I got a better shot. When backlighting you’ll want to overexpose your image.
* You can overexpose your image on your iPhone by simply tapping the dark part of the screen.
02. Golden hours - an hour after sunrise and an hour before sunset are considered the “golden hours”. Which means that the sun is low in the sky and gives off a beautiful glow. Is that practical for most moms? No. If you’re outside during any other time of the day try heading for open shade. That means a covered porch, the shaded side of a building, etc. Or try backlighting (turning your subject so that the sun is behind them and overexposing - as explained in tip #1).
03. Cloudy days - clouds are great for diffusing the harsh sunlight. That means on a cloudy day you can shoot anywhere without the shadows!
04. Indoors - if you’re indoors turn off the overhead or artificial lights and open up those windows. You may need to move your subject closer to your light source (a window or glass door) if your home isn’t well lit.
05. Front lighting - front lighting is essentially the easiest way to get a well lit your image if you’re indoors, under open shade, or if it’s a cloudy day. That means that YOUR back is to the light source.

To learn more about lighting, the basics of photography, and how to take better pictures of your children check out the newly recorded webinar version of my photography workshop.
